| Tips and Techniques
TECHNIQUES IN APPLYING YOUR TESSERAE
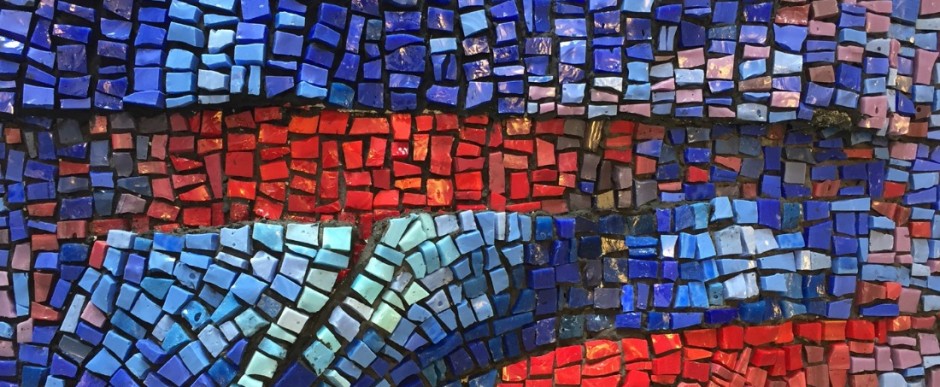
Now that you have broken your tesserae it is time to fit them back together. This is the magic of mosaic. It is always a wonder how certain pieces of tesserae of many different colors and textures all of the sudden fit together like they were meant to be. I love to watch my students feel such accomplishment when their fittings are spot on. It takes a lot of practice and patience to get there but the gratification is great.
Fittings are where two pieces of tesserae sit next to each other with the same amount of space between them. Whether you are working with tile or stained glass it makes a piece look more cohesive when the consistency is there. To accomplish that you must first start with a generous amount of tesserae. You will always have left overs and you need to account for breakage but to have choices for your fittings is very important.
It is always a good idea when first starting a piece to layout without gluing down a portion of your piece to see how your fittings are going. Once you feel confident your pieces are fitting nicely then you can begin to glue down with which ever adhesive you have chosen.
After you have finished gluing down your mosaic it will be time to grout and you will see in your final reveal how great your piece is because your fittings are very purposeful and you did not try to squeeze a piece of tesserae into a space that was not meant to be.
A side not when working with Smalti, the fittings are a little different. Grout traditionally is not used in a Smalti mosaic therefore your fittings are much tighter or closer together as you do not want to see your substrate in between your Smalti pieces.
Reminder if you want to purchase many of these tools they are for sale at the SBSMA supply store.
Stay tuned next month for…..Choosing your grout.
|